Tick may look small, but his mines pack a serious punch! Master the art of long-range zoning, strategic placement, and relentless pressure to control the battlefield. In this guide, you'll learn how to maximize Tick’s explosive potential, dodge incoming threats, and keep your enemies scrambling for cover. Whether you're playing defense or pushing the attack, these tips will help you turn every match into a well-calculated victory. Get ready to dominate with Tick!
Last Hurrah
Tick gains a 50% shield for 1.0 seconds. After that, it bursts out for 1280 damage.
Well Oiled
When Tick takes no damage and doesn't attack, he starts recovering health 2 seconds faster than normal.
Thicc Head
Tick's Head gains 1000 extra Health.
Health
Recover Health 50% more effectively.
Guide
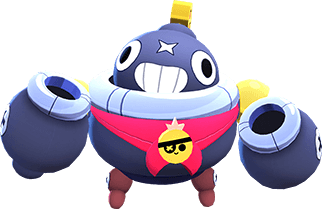
Tick: The Explosive Menace💥🤖Tick may have the least health in the game 😬, but he’s also the most annoying brawler when played right 😈. With absurdly long-range bombs 🎯💣 that ignore walls and a Super that will hunt down enemies like a debt collector 🤯, Tick specializes in area control and psychological warfare (seriously, people rage quit because of him).His Hypercharge? More bombs 💣💣, more stats 📈, more chaos 🔥. If that doesn’t scream maximum irritation, I don’t know what does. 😆Tick’s Personality – The Happy Little Menace 🥳💣
"Stago-stago-stageh" 🎤Tick isn’t just a brawler—he’s a walking hazard sign ⚠️ with a permanent grin 😃💥. He follows Penny like a loyal pet 🐶, but let’s be honest—he’s less of a pet and more of a bomb enthusiast 💣🤯 with zero safety regulations. His only joy in life? Explosions 💥. He doesn’t think about consequences, strategy, or his own survival, really. He just wants to watch things go BOOM 🔥—even if that includes himself. 😆Best Tick Build – Play Annoying or Go Home 🔥👾
🛠 Gadget: Last Hurrah 💥🛡
This is Edgar’s worst nightmare 😱💣. This gadget gives Tick a shield 🛡 and a knockback explosion 💥, which is perfect against assassins like Edgar and Fang. Use it wisely, and they’ll never make it out alive. 🚫💀⭐ Star Power: Well-Oiled ⚙️
Tick now heals ❤️ 1 second after taking damage or attacking. Pair this with Heal Gear, and he becomes a constantly regenerating annoyance. Especially like Piper 🎯.⚙️ Best Gears
Thicc Head 🤯 – Makes Tick’s Super even harder to destroy.Health 💖 – Combos perfectly with Well-Oiled for maximum survivability.Shield 🛡 – Tick has the lowest health in the game 😬, so this gear helps him not evaporate instantly.Tick’s Strengths & Weaknesses 🆚✅ Strengths✔️ Exceptional area control 🗺 – His mines force enemies to reposition 🏃♂️.
✔️ Long-range attacks 🎯 – Can lob bombs over obstacles 🏗.
✔️ High damage potential 💣 – If all mines hit, enemies are done for 💀.
✔️ Strong defense 🏰 – Perfect for blocking choke points ⛔ and zoning enemies.❌ Weaknesses🚨 Lowest health in the game 😬 – He dies if you breathe on him too hard 😭.
🚨 Slow reload speed 🐌 – Ammo must be managed carefully 🎯.
🚨 Struggles against fast brawlers 🏃 – Assassins like Mortis dance around his mines 💃.
🚨 Super can be destroyed easily 🚀 – Tick’s Head gets sniped quickly 🎯 by rapid-fire brawlers.Best Strategies for Tick 🧠💣
✔️ Stay behind cover 🏰 – Tick is fragile, so always hide behind walls.
✔️ Control choke points 🚫 – Tick is a zoning master. Block narrow paths with bombs 💣.
✔️ Avoid open spaces 🌳 – Snipers like Piper & Brock will turn Tick into scrap metal 🛠.
✔️Predict enemy movement 🏃 – Throw mines where enemies WILL be, not where they are 🎯. ✔️ Corner opponents ⬛ – If an enemy is near a wall, trap them by throwing mines behind them 🔥.💡 PRO TIP: If Edgar jumps on you, fire bombs straight at yourself 💣🔄. That way, 9 mines detonate instantly, deleting him from existence INSTANTLY 🚫💀.How to Use Tick’s Super Effectively 🎳💣
✅ Use it defensively 🛡 – If an enemy chases you, launch Tick’s Super, forcing them to retreat 🏃♂️.
✅ Count enemy ammo 📊 – If an opponent has low ammo, they can’t destroy your Super before it explodes 🤯.
✅ Combo with mines 💣💥 – Throw mines first, then deploy your Super for a deadly trap ⚠️.
✅ Predict knockback 🔄 – Drop mines where enemies will land after knockback effects 🎯.Tick’s Best & Worst Matchups 🤺
✅ Best Matchups – Who Tick Destroys
✔️ 8-Bit 🎮 – His slow movement makes him an easy target for Tick’s zoning.
✔️ Willow 🧿 – Tick can keep her at a distance to prevent her abilities.
✔️ Hank 🦑 – Tick’s bombs force Hank to reposition.
✔️ Frank 🏋️ – Last Hurrah interrupts Frank’s Super.
✔️ Ash 🪓 – Tick’s mines prevent Ash from charging rage properly.💡 Strategy vs These Brawlers:Keep them at a distance 📏—they struggle against Tick’s zoning.Use walls 🏰 for cover, while Tick throws bombs over them 🎯.Block choke points 🚫—don’t let them reach objectives.❌ Worst Matchups – Who Tick Fears❌ Mortis 🦇 – Dashes past Tick’s mines and deletes him.
❌ Leon 🐺 – Goes invisible, sneaks up, and poof Tick is gone.
❌ Edgar 🤜 – Can jump over mines and attack directly.
❌ Piper & Brock 🔫 – Tick gets sniped in open areas.💡 Strategy vs These Brawlers:Stay behind cover 🏰—avoid snipers.Use Tick’s Super defensively 🎳💣—force assassins to retreat.Keep moving 🏃—don’t be predictable.Tick’s Guide for Every Game Mode✅ Gem Grab
✔️ Control the center—Tick can deny enemy movement near the gem spawn.
✔️ Protect the gem carrier—stay behind cover and zone out enemies.🔥 Best Build:
Gadget: Last Hurrah
Star Power: Well Oiled
Gear: Shield✅ Hot Zone
✔️ Block enemy entry—Tick can prevent enemies from entering the zone.
✔️ Pair with tanky teammates—they hold the zone while Tick controls space.🔥 Best Build:
Gadget: Mine Mania
Star Power: Automa-Tick Reload
Gear: Thicc Head✅ Showdown (Solo & Duo)
✔️ Play defensively—Tick is fragile, avoid direct fights.
✔️ Use mines to control space—keep enemies away.🔥 Best Build:
Gadget: Mine Mania
Star Power: Well Oiled
Gear: Thicc Head, Shield🎯 Bounty – Tick the Sniping Menace
Best Strategy: 💣 Play defensively – Tick’s long-range bombs make him ideal for staying safe 🏰. 🎯 Target squishy Brawlers – Chip away at enemies without exposing yourself 😈. 💥 Use Tick’s Super to finish enemies off – If they’re low on health, send in Tick’s explosive head! 🤯🔥 Best Build: ⚙️ Gadget: Last Hurrah (because survival is key!) 🛡 ⭐ Star Power: Well Oiled (so Tick keeps regenerating like a mosquito you can’t swat!) 💖 ⚙️ Gear: Shield (because let’s face it, Tick needs all the protection he can get!) 🛡🔄 Knockout – Tick the Master of Movement Control
Best Strategy: 🚧 Control enemy movement – Tick’s mines force enemies into bad positions 📏. ❤️ Stay alive at all costs – Knockout has no respawns, so avoid unnecessary risks 🏃. 🎳 Use Tick’s Super wisely – It can secure eliminations and pressure opponents 💥.🔥 Best Build: ⚙️ Gadget: Last Hurrah (for emergency explosions and defense!) 💣 ⭐ Star Power: Well Oiled (faster healing means more annoying zoning!) 🏥 ⚙️ Gear: Thicc Head (because a stronger Super is ALWAYS better!) 🤖🔥 Heist – Tick the Long-Range Safe Terrorizer
Best Strategy: 💣 Chip away at the safe – Tick’s mines deal consistent damage over time 🎯. 🚧 Control enemy movement – Prevent opponents from reaching your safe 🛡. 💥 Pair with high-damage teammates – Tick is not the main damage dealer, but can annoy enemies to death 😈💣.🔥 Best Build: ⚙️ Gadget: Mine Mania (for maximum bomb spam!) 💥💥 ⭐ Star Power: Automa-Tick Reload (faster attacks = more destruction!) 🔄 ⚙️ Gear: Damage (because why NOT make explosions even stronger?) --------------------------------------------
Final Thoughts – How to Maximize Tick’s Chaos🤯🔥Tick isn’t about honor or fairness ⚖️—he’s about making enemies rage quit 💢 while laughing uncontrollably 🤣. Play defensively, control space 🗺, and always predict movements 🏃 to explode enemies before they know what hit them 💥.Be annoying. Be unpredictable. And most of all, enjoy watching everything explode! 💣😆🔥
Game Modes
Hot Zone
### 2. Hot Zone#### Best Strategy- Block enemy entry: Tick’s mines can prevent enemies from entering the zone.
- Stay at a distance: Avoid direct combat and focus on area denial.
- Pair with tanky teammates: Let them hold the zone while Tick controls space.#### Best Build- Gadget: Mine Mania (for extra mines)
- Star Power: Automa-Tick Reload (for faster attacks)
- Gear: Thicc Head (boosts Super health)
Best maps: 1. Open business 2. Dueling beetles
Gem Grab
### 1. Gem Grab#### Best Strategy- Control the center: Tick’s mines can deny enemy movement near the gem spawn.
- Protect the gem carrier: Stay behind cover and zone out enemies.
- Force enemies to reposition: Use mines to block escape routes.#### Best Build- Gadget: Last Hurrah (for survivability)
- Star Power: Well Oiled (for faster healing)
- Gear: Shield (extra survivability)
Tip: do not be the gem carrier.
Bushy maps aren't good for him.
Works Well With
Charlie
They are the perfect synergy! While Charlie struggles with the throwers, Tick can help her, and she can help him with the assassins. Just cocoon the enemy and Tick places mines on the cocoon. Then, BOOM!
About This Build
This build, Mastering Mayhem: A Complete Tick Guide, was created by Sckhlex64 on Apr 2, 2025. The build is for the Brawler, Tick, and uses the Last Hurrah gadget, Well Oiled star power, Thicc Head gear, and Health gear. To see more, you can go here to view the best Tick build and others.
If you'd like to support your favorite builds and creators, make sure to upvote their builds, videos, and anything else they share that you find useful. Check out the profile page of Sckhlex64 for more of their guides.
Want to create your own build to share? Head over to our Build Creator and show everyone what you got!